Tailscale private networking
Tailscale provides a private mesh VPN that lets you access your Companion Hub apps from anywhere — without exposing them to the public internet.
When to use Tailscale
Tailscale is ideal when:
- You want private access to your apps from your devices only
- You don’t want apps publicly accessible on the internet
- You need to connect multiple machines in a private network
- You want to access your Hub from anywhere securely
- You own more than one Companion appliance and want them to share AI capacity — see Hub Pool, which runs entirely over the tailnet you set up here
Benefits
- Access from anywhere — Securely reach your Hub from any location
- Connect all devices — Link Windows, Mac, Linux, iOS, and Android devices
- Automatic NAT traversal — No port forwarding needed
- End-to-end encryption — Encrypt all traffic between devices
- Free for personal use — Tailscale offers a free Personal plan
Setup options
Companion Hub offers two ways to use Tailscale. Both end in the same place — your Hub on your tailnet with a 100.x.y.z address — and differ only in where the Tailscale daemon runs and how the Hub container reaches it:
flowchart TB
    subgraph sidecar["Option 1 · Hub sidecar (needs a key or a saved login)"]
        direction TB
        H1["ci-hub container"] -->|"private-vpn compose profile"| TS1["hub-tailscale container"]
    end
    subgraph host["Option 2 · Host installation (used first when present)"]
        direction TB
        H2["ci-hub container"] -->|"mounted<br/>/var/run/tailscale socket and CLI"| TS2["tailscaled on the host"]
    end
    TS1 -->|"WireGuard, 100.x.y.z"| NET(("Your tailnet"))
    TS2 -->|"WireGuard, 100.x.y.z"| NET
    NET <-->|"same tailnet"| DEV["Your other devices with the Tailscale client<br/>open https://your-hub.tailnet.ts.net for the Hub dashboard<br/>or https://your-hub.tailnet.ts.net:port for a Private VPN app link"]
Private VPN works on a Linux Hub. On macOS and Windows, Hub can’t use the Tailscale app on your computer, because the Hub runs inside Docker Desktop’s virtual machine, and the sidecar route there is untested. Treat Private VPN as unsupported on those systems for now, and reach your Hub through Public Web or on your own network instead.
Option 1: Hub sidecar
Companion Hub’s stack defines a Tailscale container, hub-tailscale, that connects your Hub to your Tailscale network. Hub starts it only when it has something to sign in with: a pre-auth key (TAILSCALE_AUTHKEY) or a Tailscale login saved by an earlier session. A Hub you start with cihub also keeps the sidecar off when its .env holds PRIVATE_VPN_USER_DISABLED=true; the desktop app ignores that setting. On a fresh install with neither a key nor a saved login, no sidecar runs. The wizard then reads Tailscale needs to be installed on this computer, and Settings → Network says The Hub could not access Tailscale (no host CLI/socket and no hub-tailscale sidecar). In that case, install Tailscale on the host (Option 2), which is the reliable route on a fresh install, or start the sidecar with a pre-auth key. If Tailscale is already installed on the Hub’s host, Hub uses that instead.
The steps below apply once Hub can reach Tailscale, through the sidecar or the host client.
Enable during onboarding
When you first set up your Hub, the onboarding wizard includes a Private VPN step:
- Click Log In with Tailscale
- Authenticate in the popup window (create a free account if needed)
- Your Hub automatically joins your Tailscale network
- Continue with the wizard
The onboarding wizard polls connection status in real-time, so you’ll see when your Hub connects successfully.
Enable in Settings
If you skipped Tailscale during onboarding, you can set it up later:
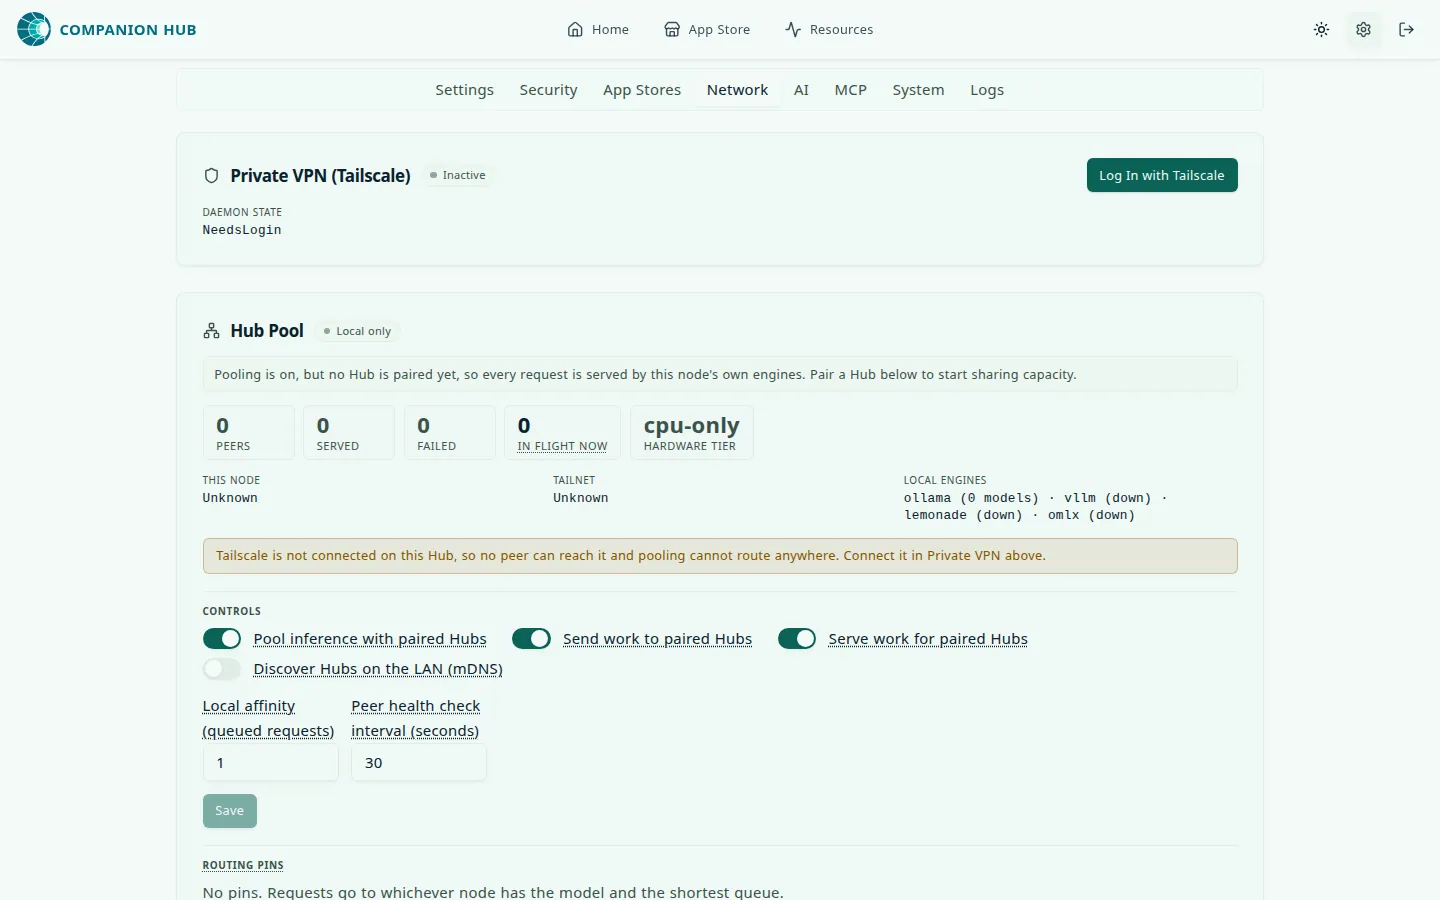
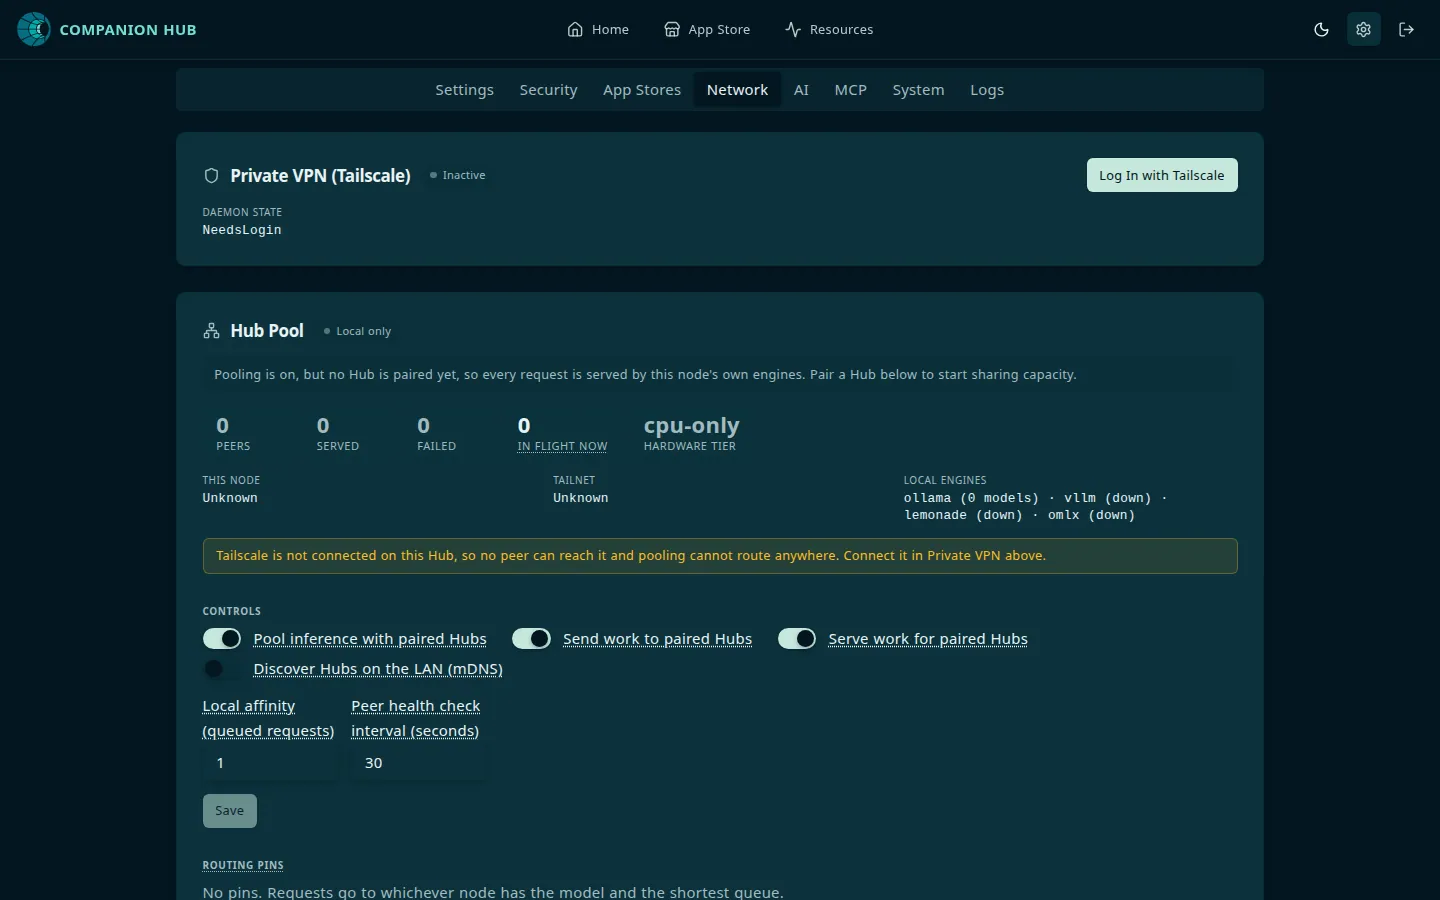
- Go to Settings → Network
- Find the Private VPN (Tailscale) section
- Select Log In with Tailscale
- Authenticate in the new browser tab
To sign in without a browser, use a pre-auth key instead.
Access your Hub
Once connected, your Hub gets a Tailscale IP address (e.g., 100.x.y.z) and a tailnet hostname. Settings → Network shows the Tailscale IP, the Hostname, and the Daemon state under Private VPN (Tailscale). For the full <device>.<tailnet>.ts.net name, open the device in your Tailscale admin console.
Install Tailscale on your other devices:
- Download from tailscale.com/download
- Join the same tailnet (use the same sign-in identity or an invited account)
- Open the Hub dashboard at
https://<device-name>.<tailnet>.ts.net/
Hub publishes its own dashboard on the tailnet with Tailscale Serve, so this address needs MagicDNS and HTTPS Certificates enabled for your tailnet — the same requirement as Private VPN app links.
With the default sidecar, the Hub dashboard is not reachable at
http://<tailscale-ip>:5002. The sidecar is a separate container and forwards
nothing on its own; only the Tailscale Serve addresses are published. The
direct-port form works only with a host installation (Option 2).
Option 2: Host installation
If Tailscale is already installed on the Hub’s host, Hub uses that client
instead of the sidecar. The stock Compose file mounts the host’s Tailscale
socket directory and CLI into the ci-hub container, so there is nothing to
configure. Hub uses the host client when the CLI and the tailscaled socket
both answer, and falls back to the sidecar otherwise.
Install Tailscale on host
curl -fsSL https://tailscale.com/install.sh | sh
sudo tailscale up
Check the socket mount
The stock Compose file mounts ${TAILSCALE_SOCKET_DIR:-/var/run/tailscale} and
${TAILSCALE_BINARY:-/usr/bin/tailscale} into the ci-hub container. Set
TAILSCALE_SOCKET_DIR or TAILSCALE_BINARY in the Hub’s .env if your
distribution puts them somewhere else. The Hub container user must be able to
read and write the socket. If it cannot, Hub falls back to the sidecar.
The host’s tailscaled accepts changes only from root or the host’s Tailscale
operator. If the account the Hub runs as is neither, which is the usual case on
Linux, Tailscale refuses the Hub’s changes and Hub can’t publish its dashboard or
any Private VPN app. Settings → Network then shows Tailscale refused the
Hub’s changes with the command to run, and each affected app’s Access
points card reads Refused. See Tailscale refused the Hub’s
changes.
Access your Hub
Open the Hub dashboard at https://<device-name>.<tailnet>.ts.net/. With a host
client you can also use http://<tailscale-ip>:5002. Apps still need their own
Hub exposure setting; use Private VPN for the managed HTTPS links described
below.
Accessing apps over Private VPN
When you enable Private VPN for an individual app (App → Settings → set exposure to Private VPN → Save), the Hub automatically publishes that app on your Tailscale node using Tailscale Serve . Each app gets its own HTTPS port on your Hub’s Tailscale hostname:
https://<your-hub>.<tailnet>.ts.net:<app-port>For example, a code-server app on port 8138 becomes:
https://hub-tailscale.tail-scale.ts.net:8138The Hub creates and removes these mappings for you whenever you toggle Private VPN, start/stop the app, or change its configuration — no manual tailscale serve commands required. Hub keeps port 443 of your computer’s Tailscale Serve settings for its own dashboard and one HTTPS port for each Private VPN app, and replaces anything you serve on those ports. It removes only the entries it published.
One-time setup: enable HTTPS certificates for your tailnet. Private VPN publishing uses Tailscale Serve , which requires HTTPS certificates for the tailnet. If they are not enabled when you pick Private VPN, the Hub shows an inline warning in the app’s exposure settings and a toast, both with an Enable HTTPS Certificates link to your tailnet’s DNS settings.
Enable HTTPS certificates and MagicDNS
Tailscale Serve needs HTTPS Certificates and MagicDNS on your tailnet. Select Enable HTTPS Certificates in the Hub’s toast or warning, or open the DNS page of the Tailscale admin console yourself:
Enable HTTPS in Tailscale
Enabling HTTPS allows Tailscale to provision certificates for your tailnet’s
*.ts.net names. Tailscale’s consent screen explains that machine and tailnet
names are recorded in public certificate-transparency logs. This only needs to
be enabled once by a tailnet owner or admin.
Approve Tailscale Serve, if Tailscale asks
If Private VPN still fails after HTTPS is enabled, Tailscale may be waiting for you to approve Serve for the Hub’s node. Check from the CLI. With the sidecar:
docker exec hub-tailscale tailscale serve statusWith a host installation, run tailscale serve status on the host.
If Serve is not enabled, Tailscale prints a link like
https://login.tailscale.com/f/serve?node=.... Open that URL (tailnet admin
required) and approve the requested tailnet settings:
Enable Tailscale Serve
The button opens Tailscale’s Serve consent flow. If you already have a node-specific link from the CLI output, use that instead — it skips straight to the right node.
Re-trigger the Hub sync
After enabling HTTPS (and approving Serve if needed), Hub notices within a minute and checks again every five minutes. To force a check now, toggle the app’s Private VPN setting off and back on (or restart the app) so the Hub re-creates the serve mapping. The app link then resolves.
Open the app link
You’ll find the generated https://<your-hub>.<tailnet>.ts.net:<port> URL on the app’s page. Make sure the device you’re browsing from is connected to the same tailnet.
Next: Follow the agent mobile apps guide to install OpenClaw on iOS or Android, pair it with CI-OpenClaw, or open CI-Hermes securely from an iPhone.
How it works
- Mesh Network — Tailscale creates a peer-to-peer mesh between all your devices
- NAT Traversal — Works behind firewalls and routers without configuration
- Private IPs — Each device gets a private IP (100.x.y.z range)
- Encrypted — All traffic is encrypted end-to-end using WireGuard
Troubleshooting
Sidecar not available
If Settings → Network shows “The Hub could not access Tailscale (no host CLI/socket and no hub-tailscale sidecar)”:
The sidecar starts only when Hub has a pre-auth key or a saved Tailscale login, so a fresh install has no hub-tailscale container:
-
Install Tailscale on the Hub’s host (Option 2). Hub uses the host client, and needs no sidecar.
-
Or set
TAILSCALE_AUTHKEYin the Hub’s.envfile and restart withcihub up --detached. See Pre-auth keys. -
Check whether the
hub-tailscalecontainer is running:docker ps | grep hub-tailscale cihub status # shows the Tailscale IP when connected
A Hub you start with cihub never starts the sidecar when its .env holds PRIVATE_VPN_USER_DISABLED=true. Hub still publishes through the Tailscale client on the host. See Turning Private VPN off.
Connection not working
If the login button doesn’t connect:
- Complete the authentication in the popup window
- Wait 5-10 seconds for the connection to establish
- Refresh the Settings page to see updated status
Can’t access Hub from other devices
-
Verify Tailscale is running on both devices:
tailscale status -
Ensure both devices show “Running” in Tailscale
-
Open the Hub’s tailnet address:
https://<device-name>.<tailnet>.ts.net/(read the device name from Settings → Network, and the tailnet name from your Tailscale admin console). This needs MagicDNS and HTTPS Certificates enabled for your tailnet -
With a host installation only, you can also try
http://100.x.y.z:5002orhttp://your-hub-name:5002. The default sidecar does not forward port5002, so these addresses do not work there
Private VPN app link doesn’t work
If an app has Private VPN enabled but its https://<hub>.<tailnet>.ts.net:<port> link doesn’t load, Tailscale Serve’s HTTPS prerequisites may not be enabled for your tailnet yet. Hub reports the missing prerequisites:
- A toast appears — “Couldn’t publish <app> over Private VPN: HTTPS is not enabled on your tailnet” — with an Enable HTTPS Certificates link to your tailnet’s DNS settings.
- The app’s exposure settings show an inline warning the moment you choose Private VPN.
Enable HTTPS Certificates and MagicDNS on your tailnet:
Enable HTTPS in Tailscale
If links still fail, confirm from the CLI on your Hub. With the sidecar:
docker exec hub-tailscale tailscale serve statusWith a host installation, run tailscale serve status on the host. When Serve isn’t enabled, Tailscale prints:
Serve is not enabled on your tailnet.
To enable, visit: https://login.tailscale.com/f/serve?node=...
Open that node-specific link and approve Serve for your Hub:
Enable Tailscale Serve
Then toggle the app’s Private VPN setting off and on (or restart the app) so the Hub re-creates the serve mapping. See Accessing apps over Private VPN for details.
Tailscale refused the Hub’s changes
If an app’s Access points card reads Refused, with Tailscale refused this change. Open Network settings to fix it, or Settings → Network shows Tailscale refused the Hub’s changes, the Hub is using the Tailscale client on your computer and Tailscale won’t take its changes. The host’s tailscaled accepts changes only from root or the computer’s Tailscale operator, and the account the Hub runs as is neither.
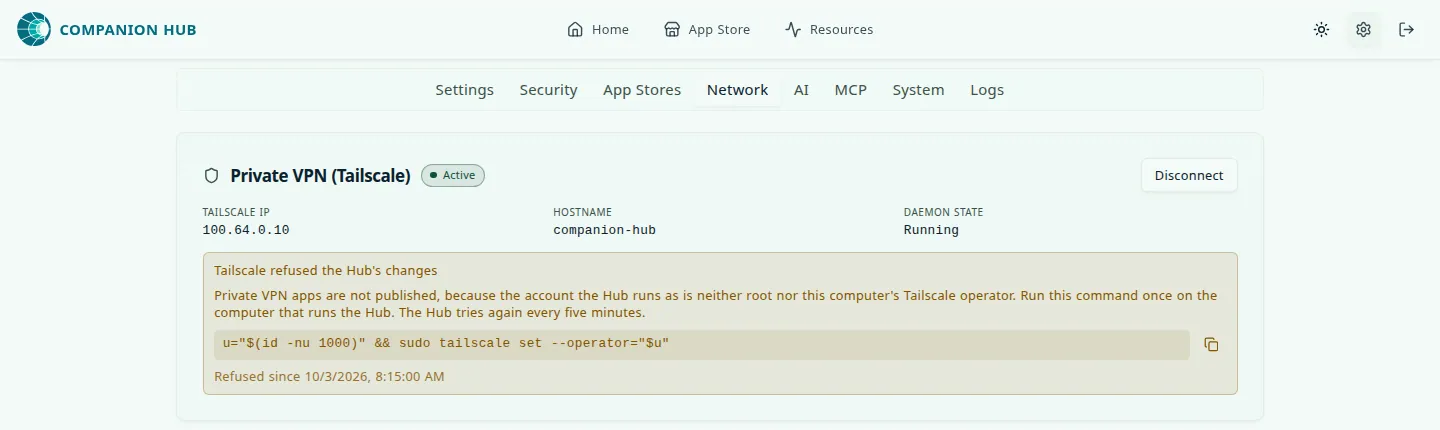
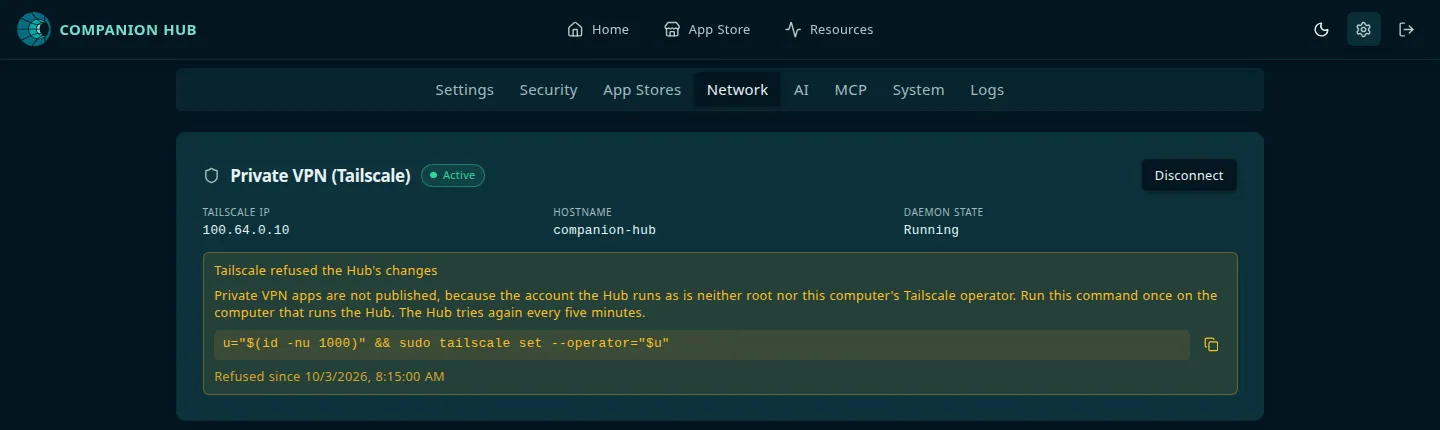
Run the command once on the computer that runs the Hub. Select the copy button next to it to copy it. For example, when the Hub runs as user ID 1000:
u="$(id -nu 1000)" && sudo tailscale set --operator="$u"Use the command your Hub shows, because the account differs between computers. The command makes that account the computer’s Tailscale operator, and replaces any operator you set before. The Hub tries again every five minutes, and the message and the Refused badges clear by themselves after Tailscale accepts a change.
Hub Pool needs the same thing: one Hub can pair with another only when Tailscale Serve publishes it at its tailnet name. cihub pool doctor is a read-only check that reports whether Serve publishes the Hub (see Before you start and the command reference in Hub Pool). Once Serve works on both Hubs, Pool two Hubs walks through the pairing and proves it with a model that exists on only one of them.
Advanced configuration
Custom routes
By default, the sidecar advertises the Docker bridge networks (172.18.0.0/16 and
172.19.0.0/16) and accepts routes advertised by other nodes. This is separate
from Hub-managed Tailscale Serve links and is only needed when you want tailnet
clients to route directly to container addresses. Tailscale may require a
tailnet admin to approve the advertised subnet route.
To customize this, set HUB_TAILSCALE_EXTRA_ARGS in your .env file. Keep an
explicit --login-server=https://controlplane.tailscale.com unless you
intentionally run your own control plane:
HUB_TAILSCALE_EXTRA_ARGS=--login-server=https://controlplane.tailscale.com --accept-routes --advertise-routes=172.18.0.0/16,172.19.0.0/16,192.168.1.0/24Turning Private VPN off
Two settings in the Hub’s .env file turn off different parts of Private VPN. Set either one to true and restart the stack.
| Variable | What it turns off | Read by |
|---|---|---|
PRIVATE_VPN_USER_DISABLED | The hub-tailscale sidecar. Hub still publishes itself and your Private VPN apps through the Tailscale client on the host, if the host has one. | cihub. The desktop app ignores it and removes the line when it starts. |
TAILSCALE_SERVE_USER_DISABLED | Tailscale Serve. Hub publishes neither its dashboard nor any app, removes nothing it published before, and no longer offers Private VPN as an app’s exposure mode. | The Hub itself. The desktop app keeps it across restarts. |
Use PRIVATE_VPN_USER_DISABLED on a computer that runs its own Tailscale and doesn’t need the sidecar. Use TAILSCALE_SERVE_USER_DISABLED when you manage the computer’s Tailscale Serve settings yourself.
With TAILSCALE_SERVE_USER_DISABLED=true, Hub leaves existing Serve entries in place and stops repairing its own entry after a device rename or tailscale serve reset. Hub Pool peers lose the Hub until someone publishes it again; the Hub log then prints the tailscale serve command to run.
Pre-auth keys (automated setup)
For headless or automated deployments, you can use a pre-authentication key instead of browser login:
- Generate a key at login.tailscale.com/admin/settings/keys
- Add it to your
.envfile:TAILSCALE_AUTHKEY=tskey-auth-... - Start the Hub with
cihub up --detached. Hub starts the sidecar because it now has a key, and the sidecar connects on startup
The desktop app rewrites the Hub’s .env file every time it starts the stack.
It keeps TAILSCALE_AUTHKEY and TAILSCALE_SERVE_USER_DISABLED, but not
HUB_TAILSCALE_EXTRA_ARGS, so a key survives restarts and custom routes
don’t. With the desktop app, add the key to .env.dev in the Hub’s data
folder (.env on Windows) and restart the Hub from the app. On Linux you can
install Tailscale on the machine instead.
Pre-auth keys should be kept secret and rotated regularly. Prefer browser login for interactive setups so you do not need to store a reusable key.
Comparison with Cloudflare
| Feature | Tailscale | Cloudflare |
|---|---|---|
| Privacy | Private mesh, no public exposure | Public URLs (can be secured with Access) |
| Setup | Browser login or pre-auth key | Requires CI Account registration |
| Device Requirement | Tailscale client on each device | Any browser works |
| Use Case | Personal, private access | Sharing with others, public apps |
| Cost | Free Personal plan available | Free tier available |
For public access to your apps, use the Cloudflare Gateway instead. You can use both Tailscale and Cloudflare simultaneously.
New to this? Reach your Hub from your phone walks the whole path end to end, including how to prove it works away from your home Wi-Fi.
Next steps
- Install Tailscale on your devices: tailscale.com/download
- Learn about exposing apps on your network
- Explore Cloudflare Gateway for public access
- Pair a second appliance with Hub Pool so your Hubs share inference capacity
- Follow Pool two Hubs to pair two Hubs end to end and check that a request is answered by the other one